Overview
Facebook is the world’s most popular social platform used by businesses to communicate with their clients, and not only.
The daily amount of information (texts, videos, images, urls) being posted in Facebook business accounts is huge and keeps growing. That’s why big companies often apply software solutions to distribute content effectively and in time.
In this article we’ll show you how to automate the process of content posting and updating through Facebook API (namely Facebook Graph API).
We’ll develop a Delphi FMX software application to post on a user’s Facebook page.
The whole process can be split into the following steps:
- create a Facebook app
- make the required adjustments in the app
- debug and test queries using the built-in Facebook API debugging tool called Graph API Explorer
- develop a Delphi Fmx (cross-platform) software application
- post some content on a Facebook page
To work with Facebook Graph API we’ll use GET, POST and DELETE methods and requests. The server response will be in JSON format.
Creating a Facebook application (not a Delphi app)
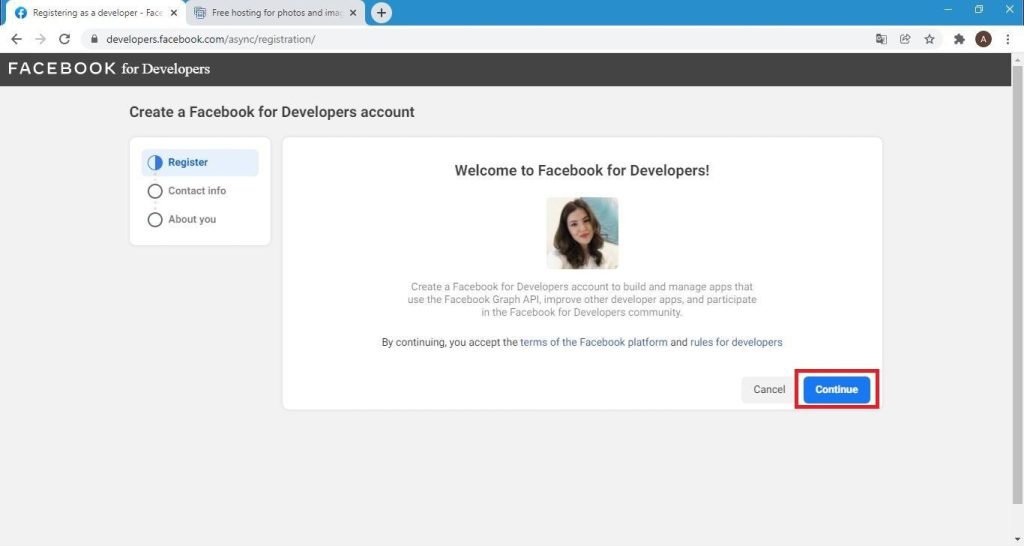
To work with Facebook Graph API you first need to sign in with your Facebook account (sign up if you do not have one). Then you need to go https://developers.facebook.com and register as a developer.
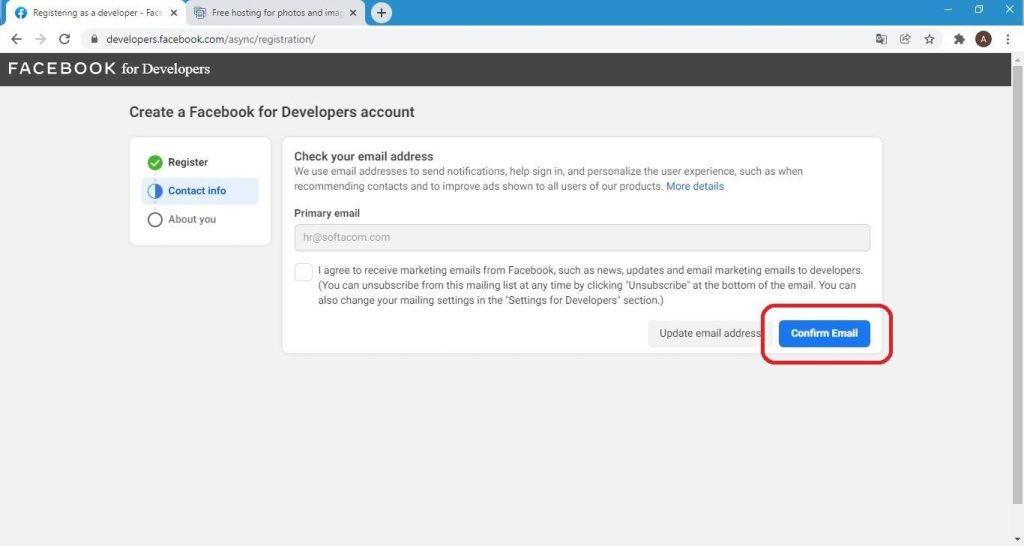
Then you need to confirm your email address
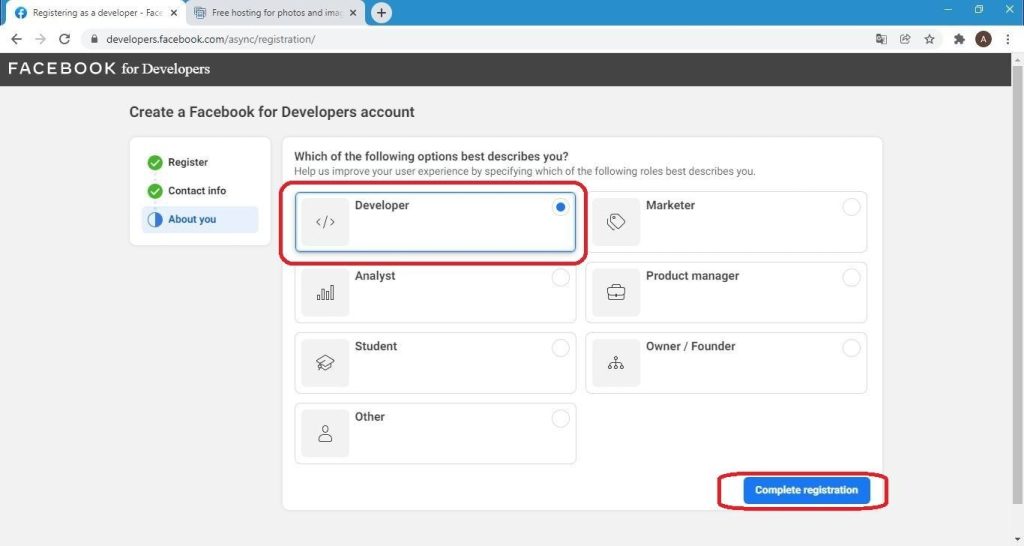
Select the profile type and click “Complete registration”.
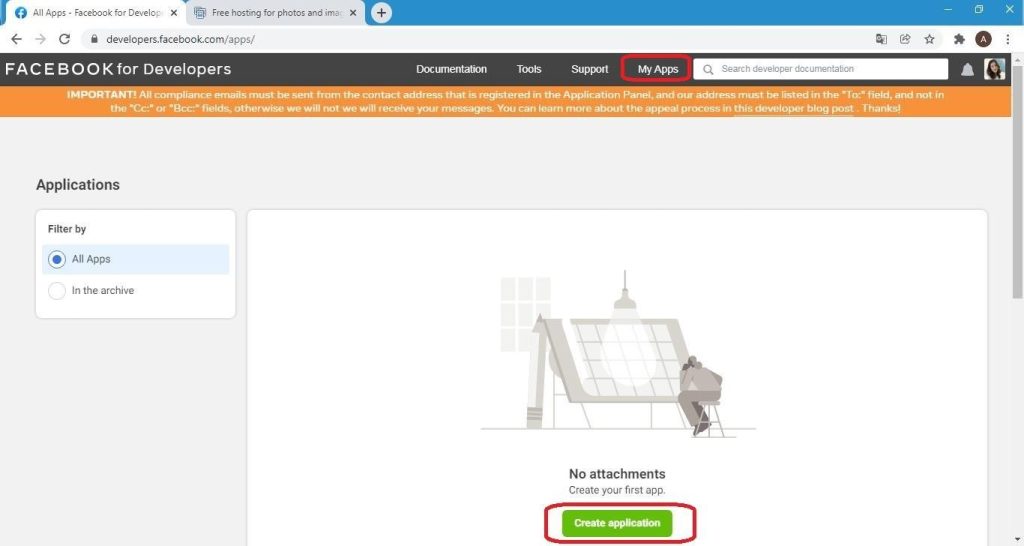
To start using the Facebook API you need to create a facebook app in My Apps.
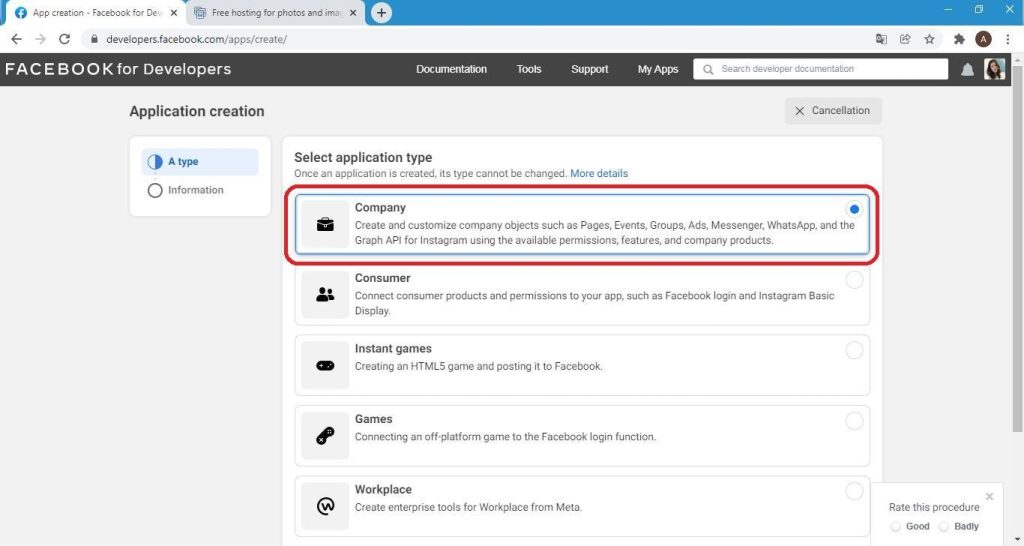
Select “Company” application type.
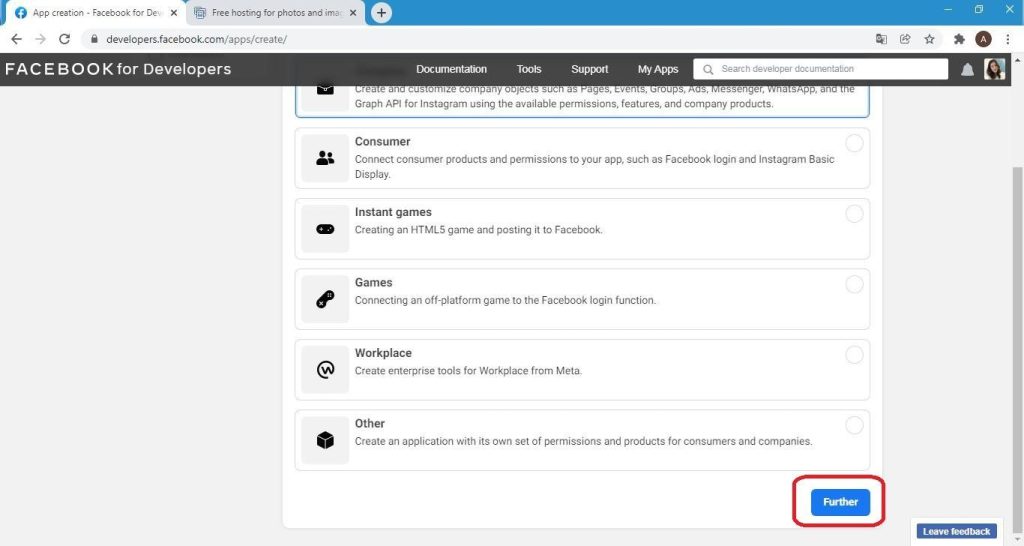
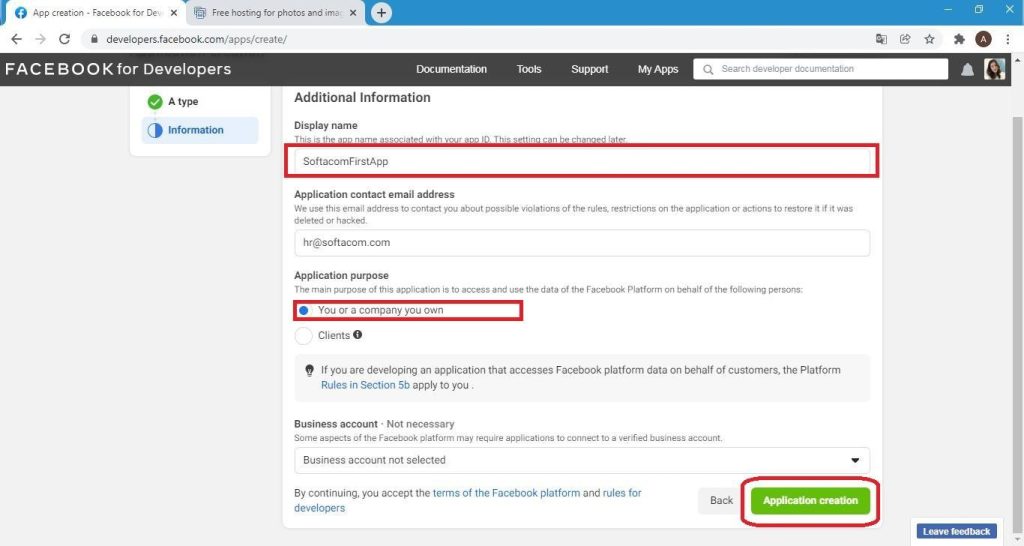
Next, enter the application name, select its purpose and click Create App.
Next enter your Facebook login password
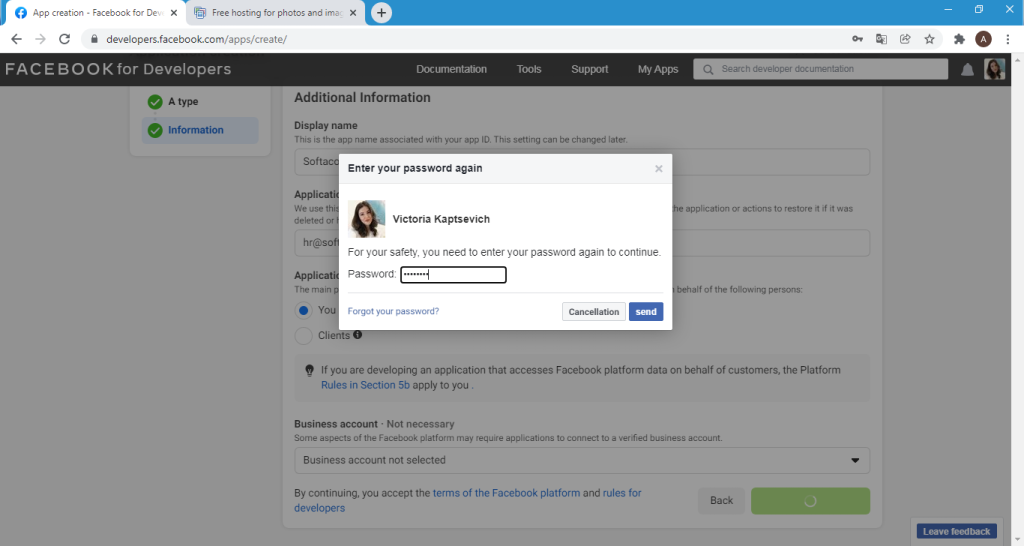
Congrats! You’ve just created a Facebook app.
Now we need to get a token to access the page and configure the appropriate permissions to start posting.
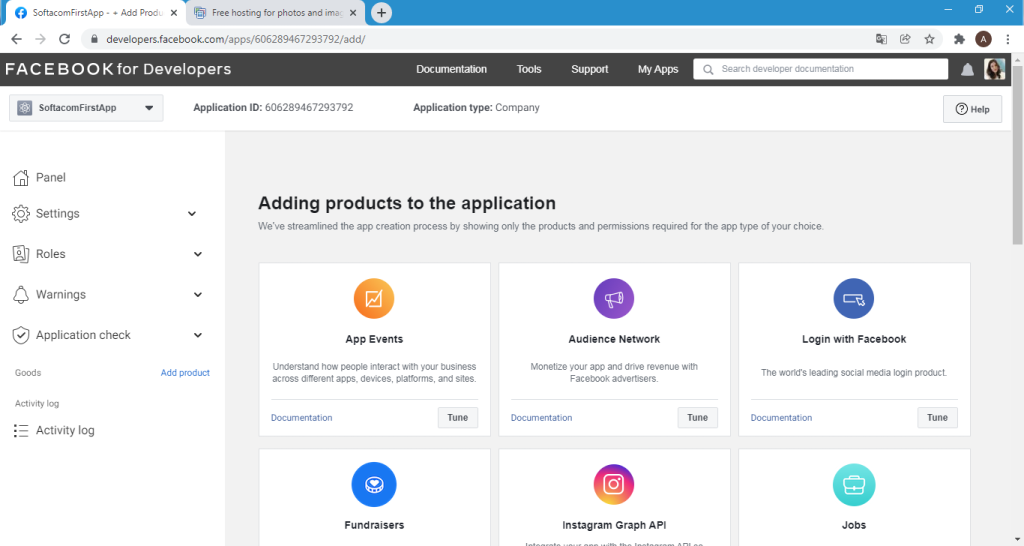
To get the token run Graph API Explorer.
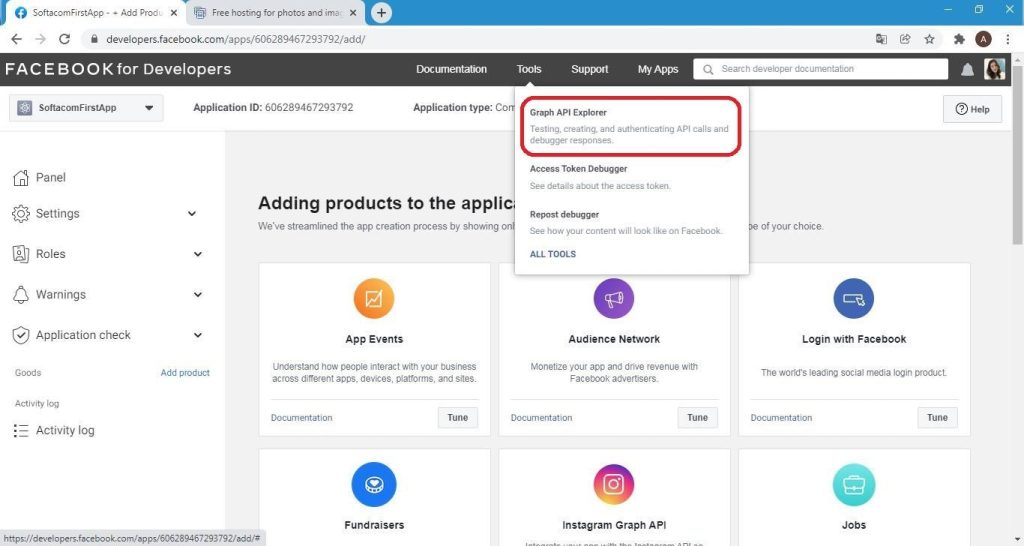
The Graph API Explorer will help us get the access token so that we can execute test queries and post to the page (Softacom’s test page).
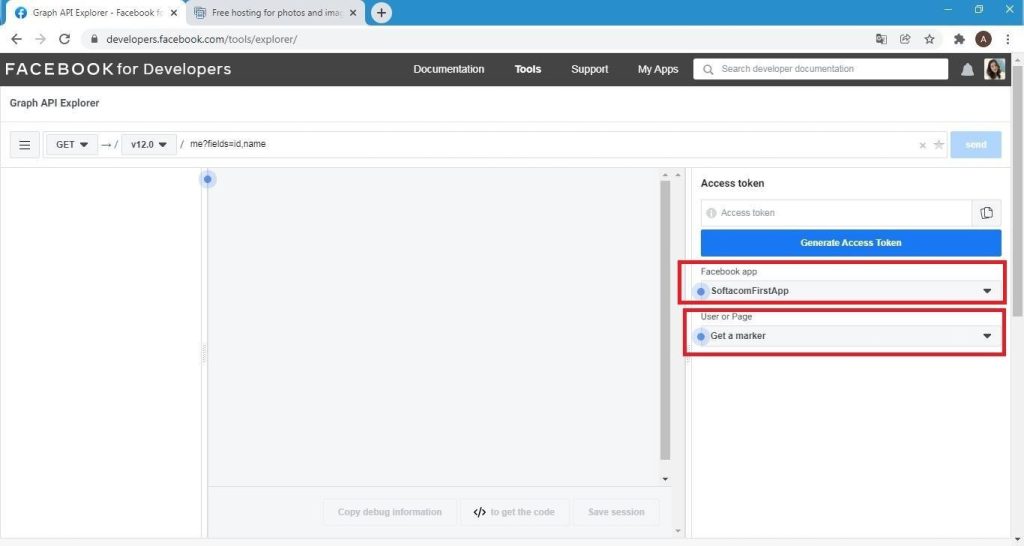
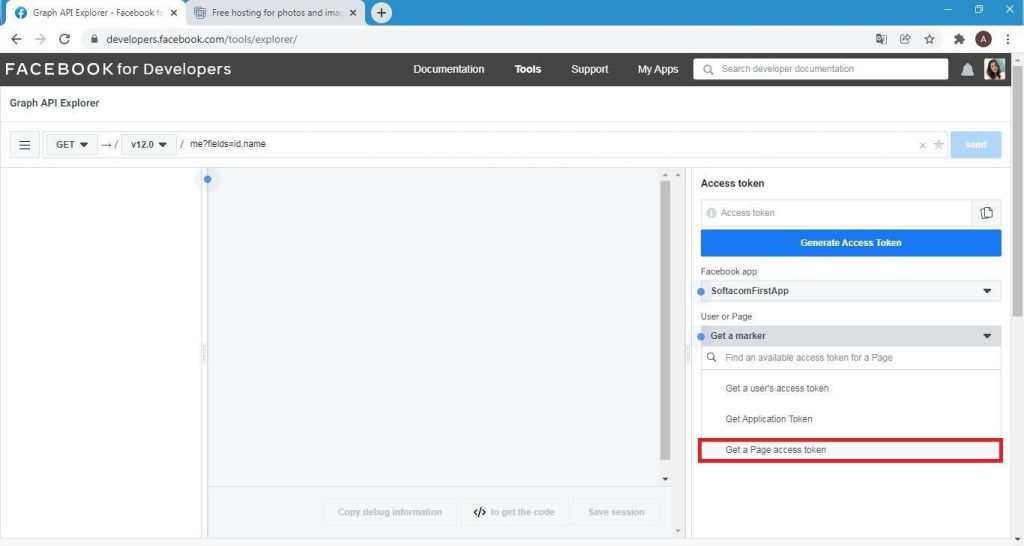
To work with the Facebook app select it from the drop-down list. To get the token to access the page, choose Get Page Access Token from the User or Page.
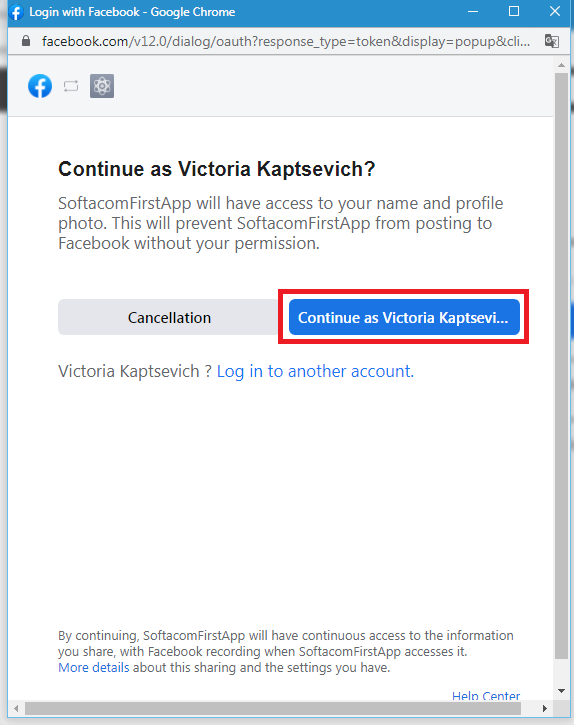
Next, click Continue
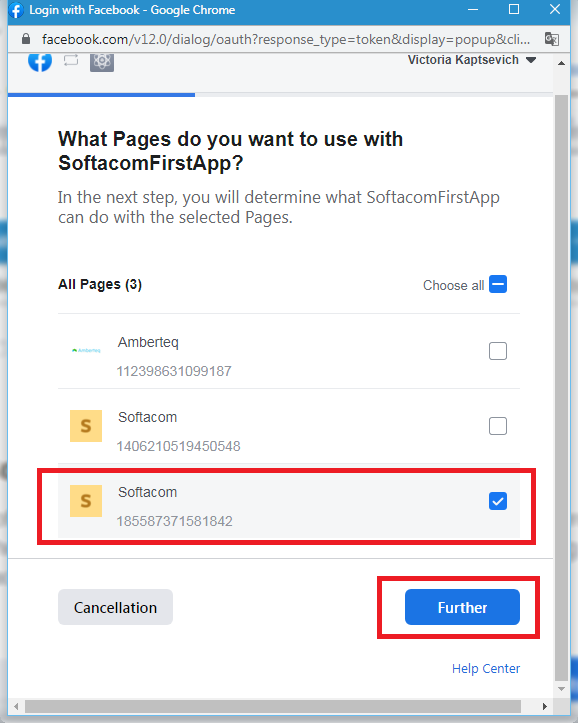
Select the page you need and save the ID for further posting:
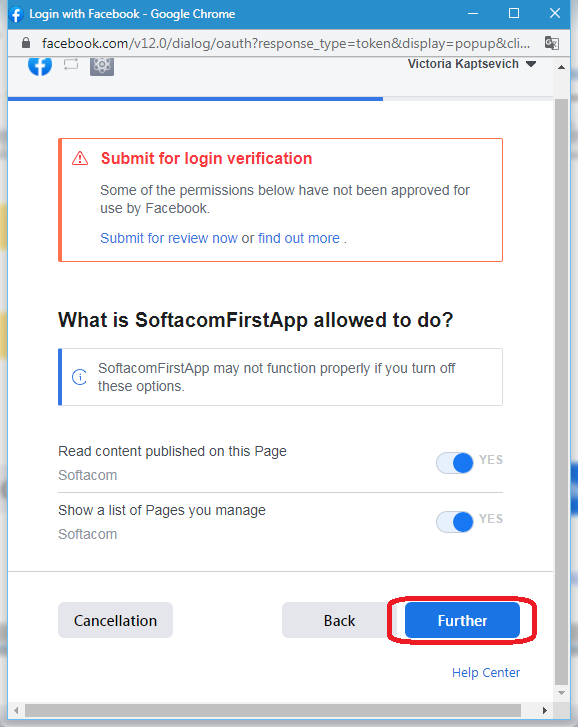
Both options have to be turned on. In our case Softacom. Click Further.
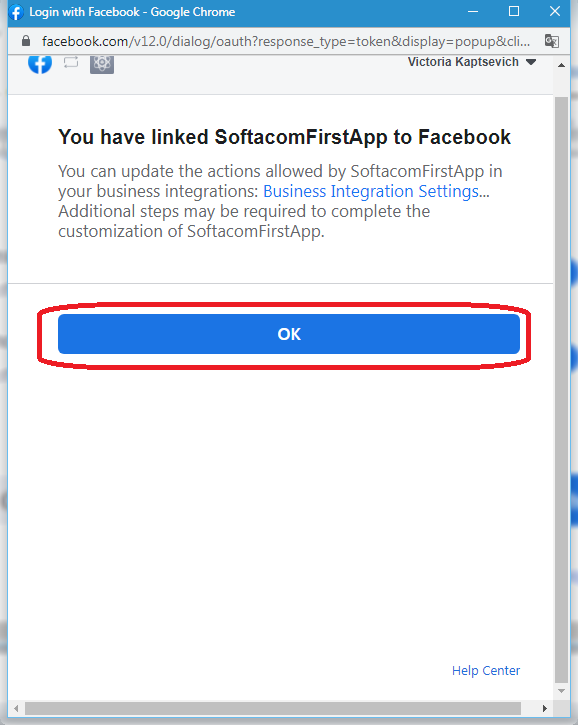
The access token has been generated.
Testing the Facebook Graph API with the built-in debugging tool Graph API Explorer
Now let’s test a GET request to get the profile name and identification number.

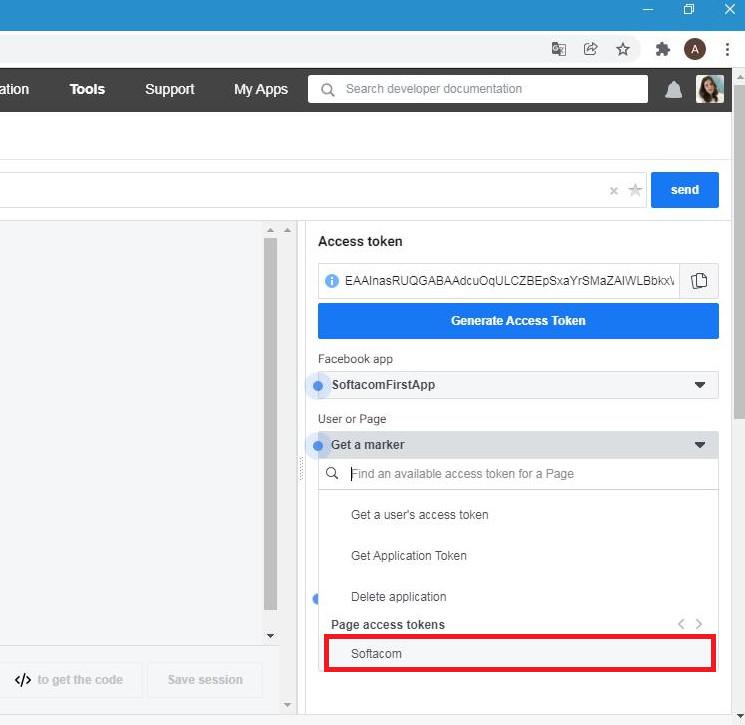
Select your page (Softacom)
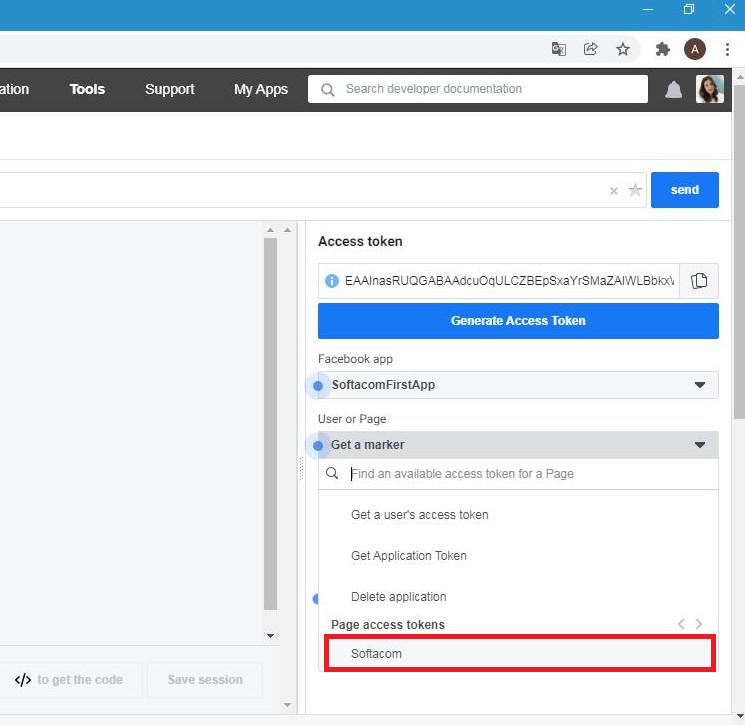
Set up special permissions for posting (publish_to_groups, page_manage_posts).
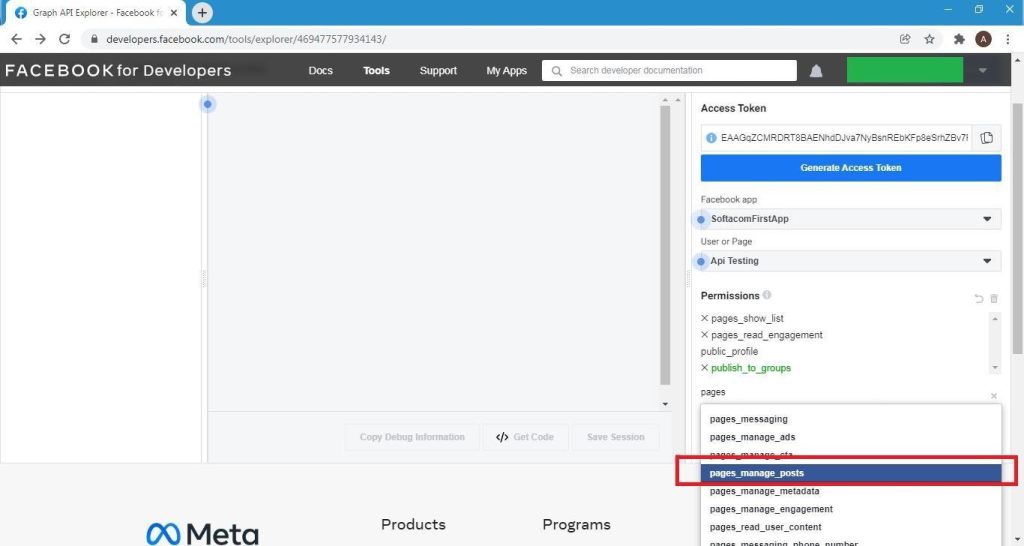
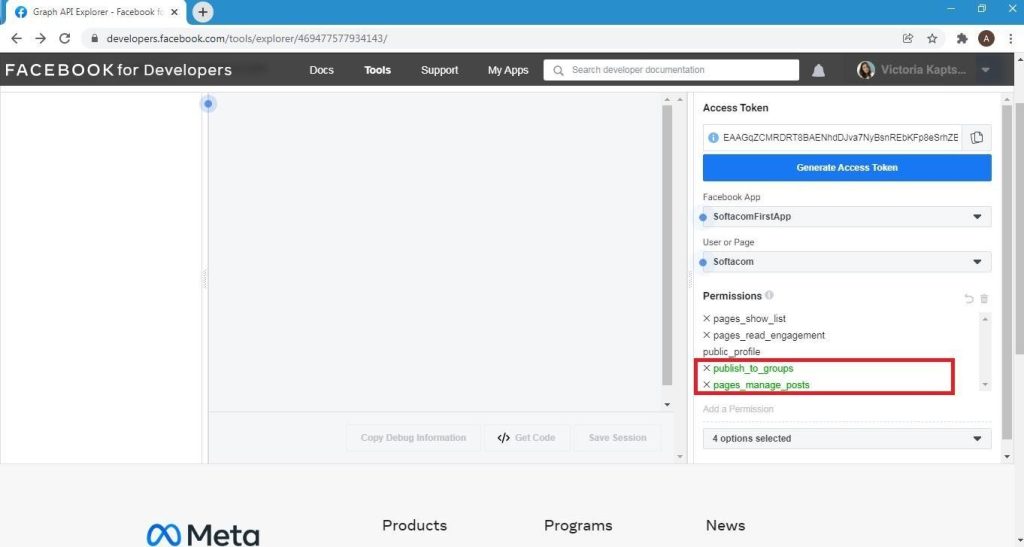
Click “Generate Access Token” to generate an access token in order to save the permissions settings.
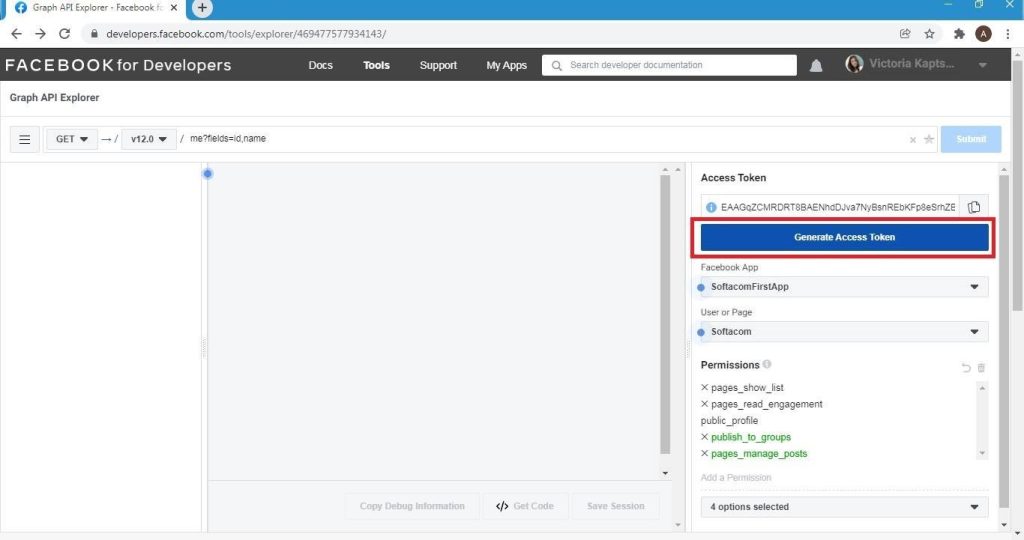
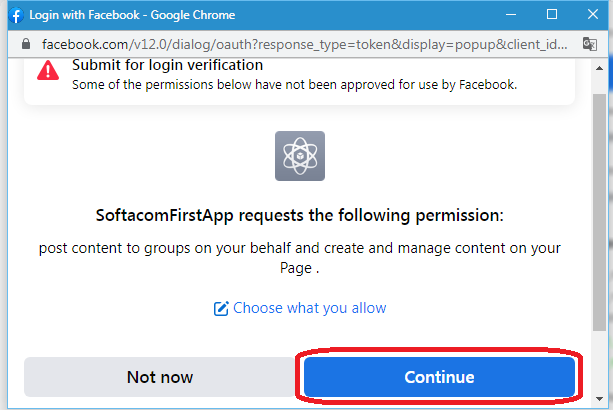
Permissions are saved successfully and a new access token has been generated.
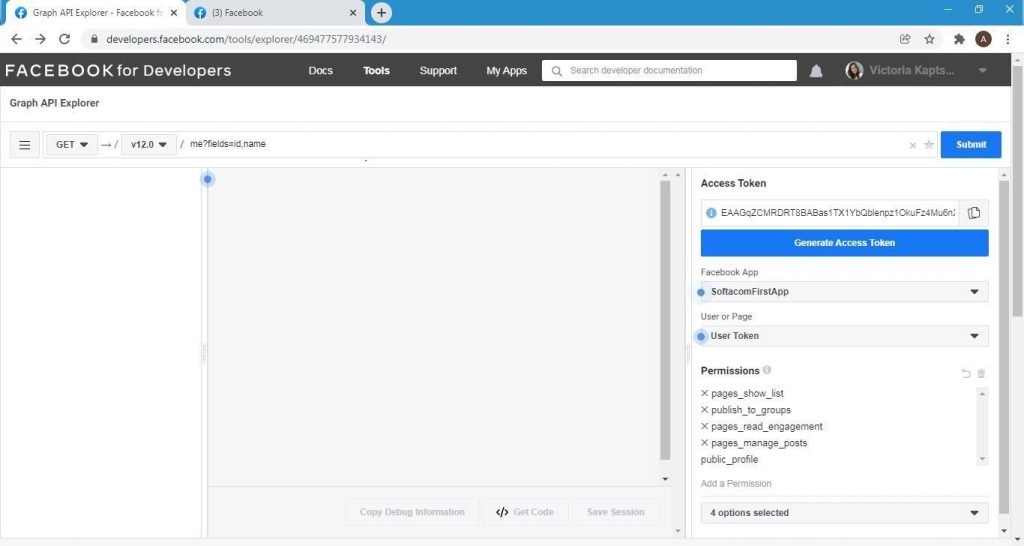
Now select your page from the list
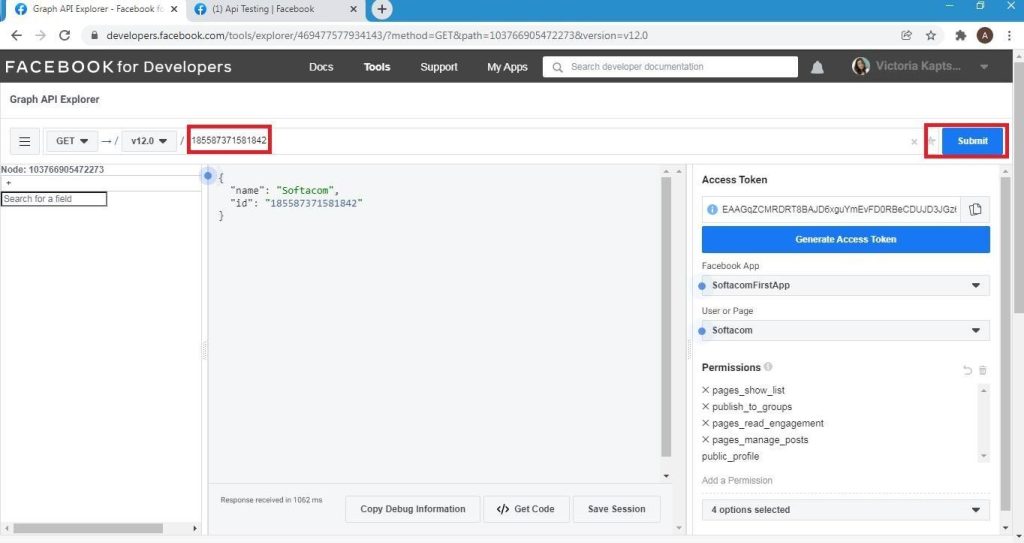
Send the GET request to get the page name and ID to ensure the Facebook Graph API works correctly.
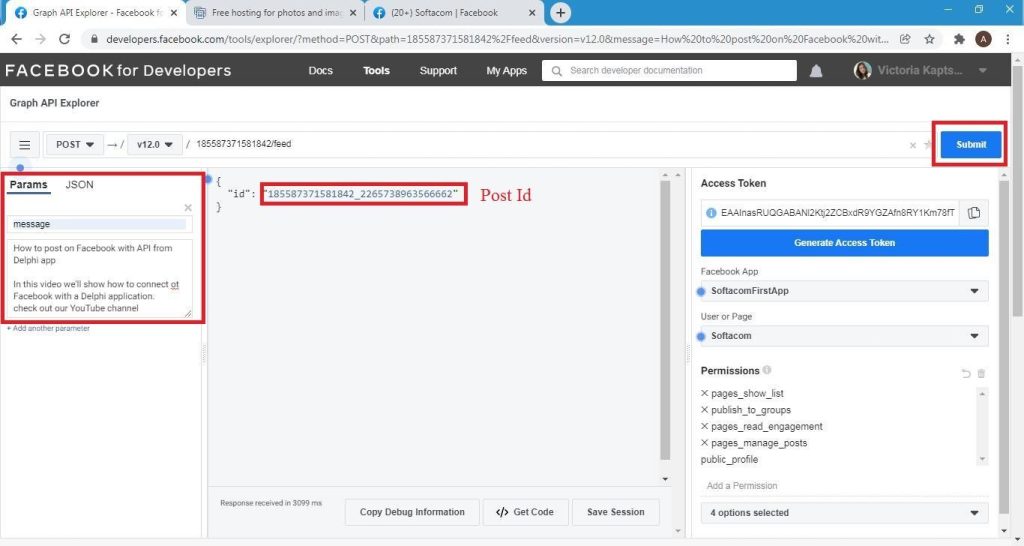
Send a test POST request to add a post to the page in form of a text message.
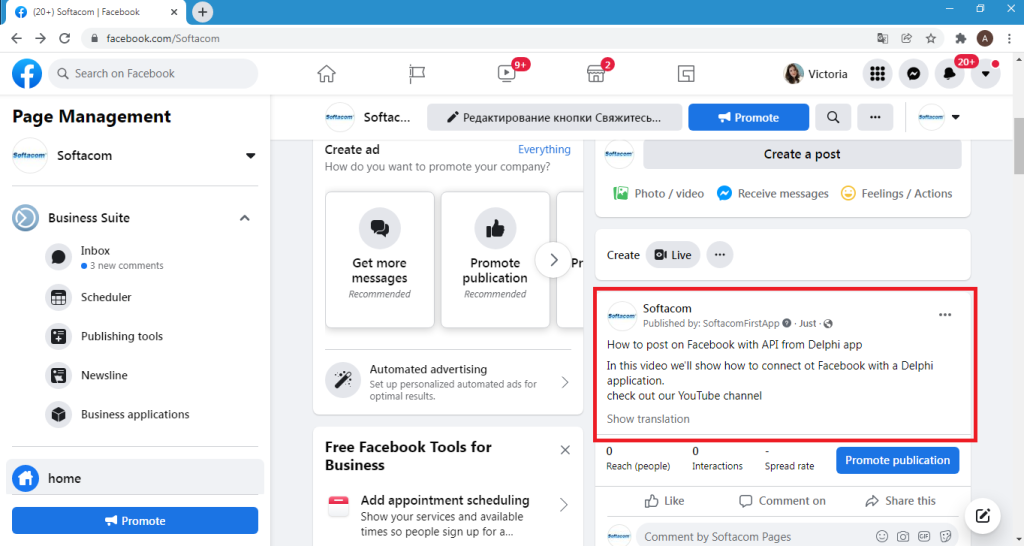
Now refresh the page and you should see the text message posted on the page.
To delete a post, execute a DELETE request using the id of our post
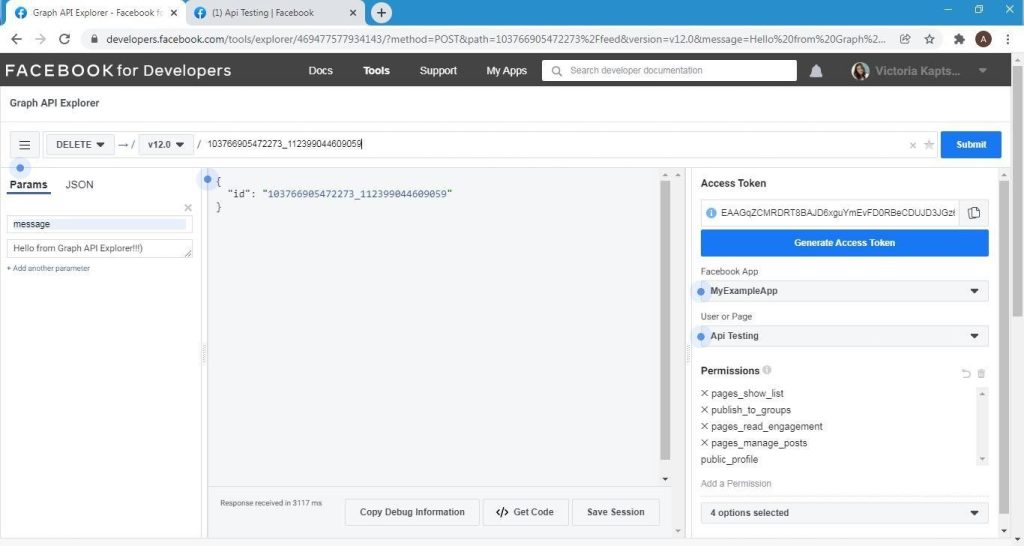
You should receive a response in JSON format telling that the post was deleted successfully.

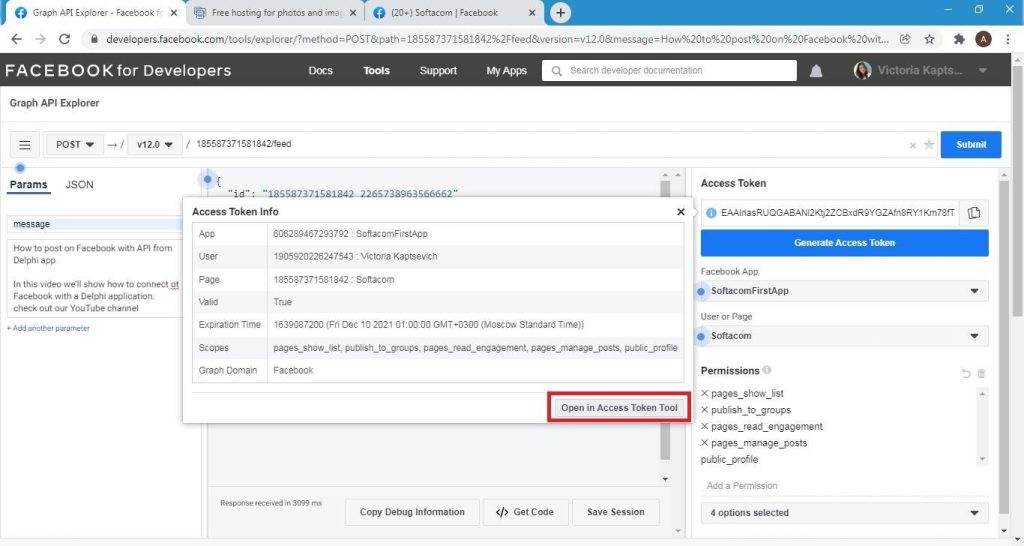
The previously received access token to the page is valid for an hour. To continue using the Facebook Graph API capabilities in Embarcadero Delphi’s FMX application, should be to obtain a long-term access token.
To get it, press “i” in front of our token.

Next Open in Access Token Tool
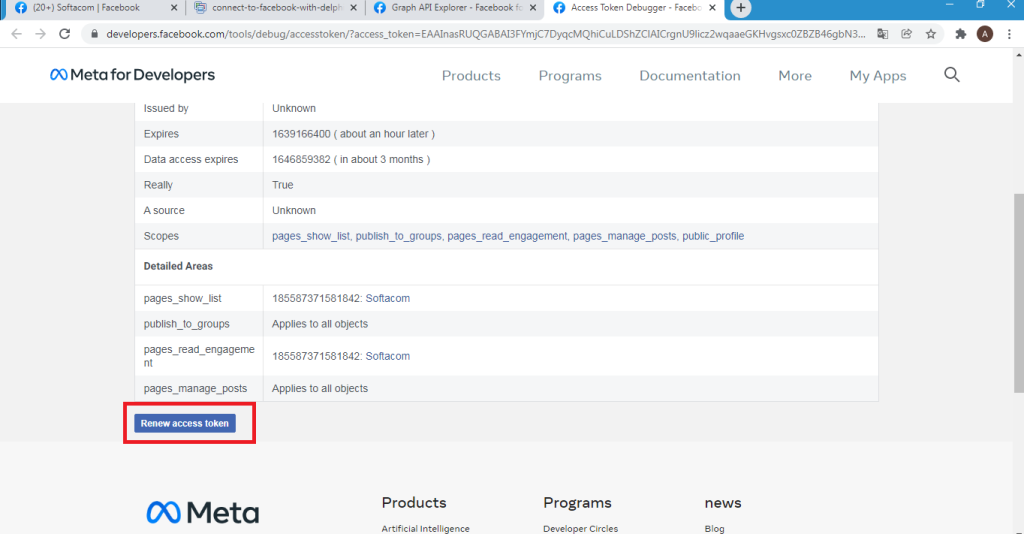
Choose Extend Access Token
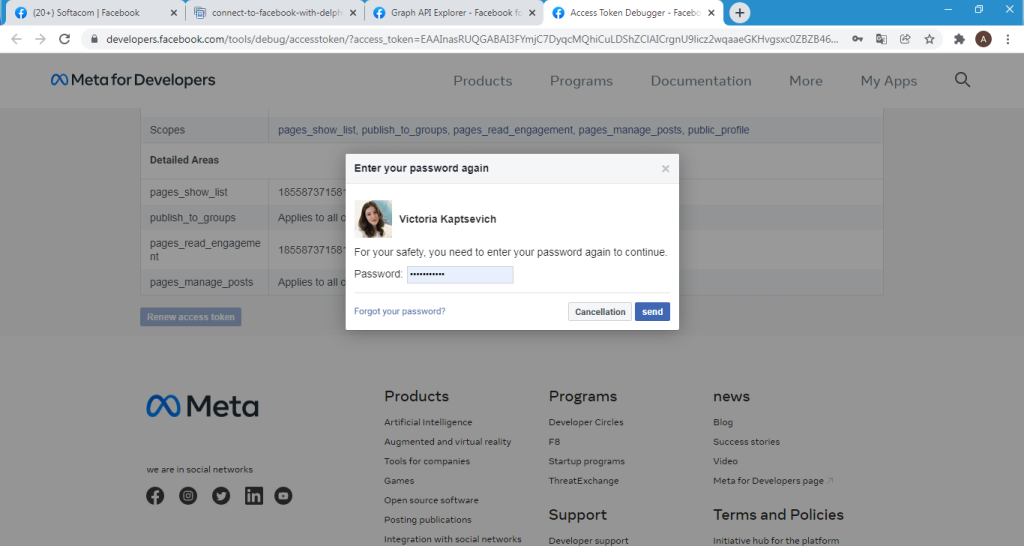
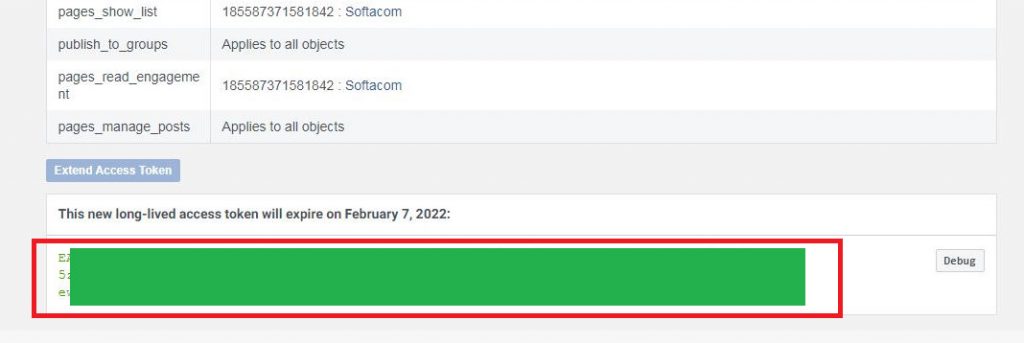
Copy and save the resulting token
For further usage of requests in the Embarcadero Delphi FMX application, you need to get the request body using Get Code
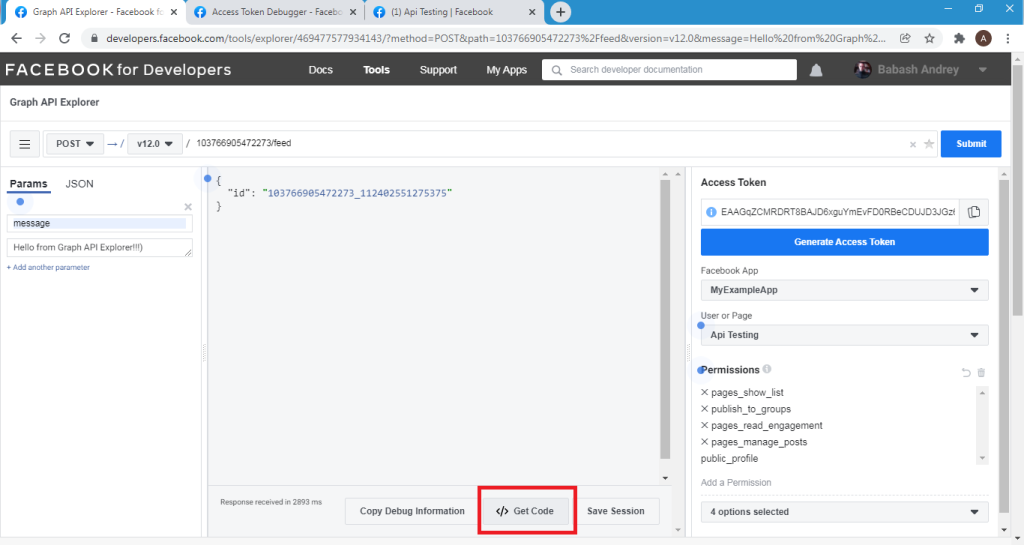
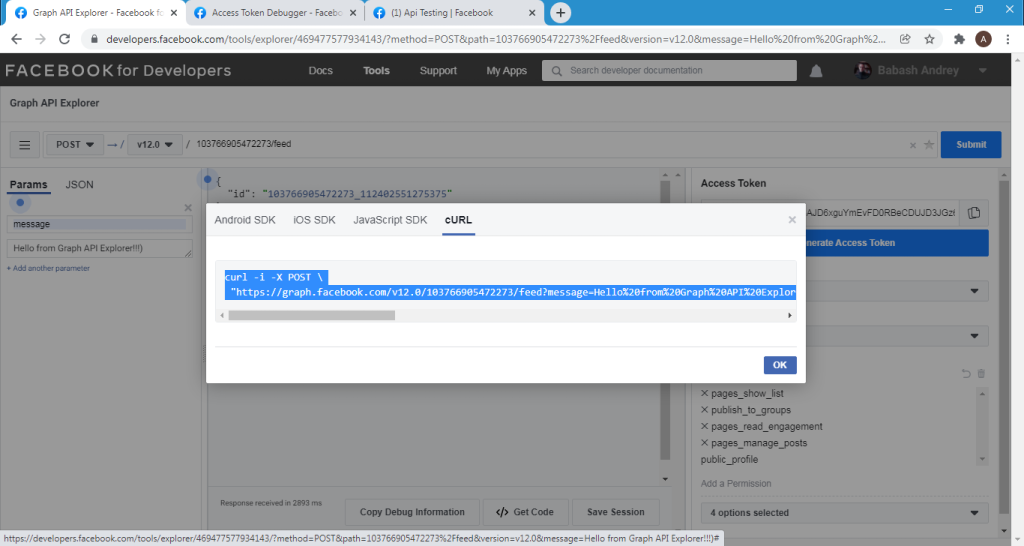
The request body must be copied and saved for later usage in Delphi. Similarly, can get the code of the remaining required requests.
Building an Embarcadero Delphi FMX app to post on a Facebook page
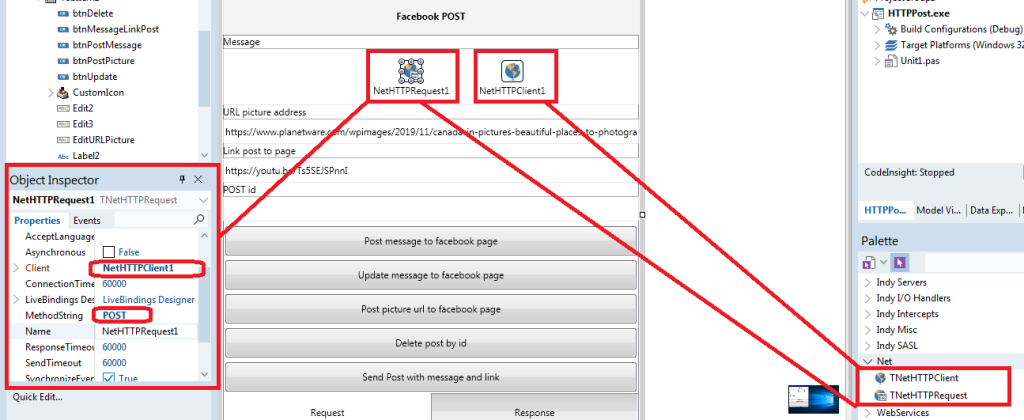
To make requests to the Facebook API and receive a response in JSON format, use the TNetHttpRequest and TNetHttpClient components from the component palette (Net tab). They can be easily dragged onto the form. To work correctly, you need to change certain settings for the components. In the TNetHttpRequest component, in the Client field, select the current TNetHttpClient component that was added to the form along with TNetHttpRequest. You also need to set the MethodString parameter to POST.
To enter messages use the TMemo component.
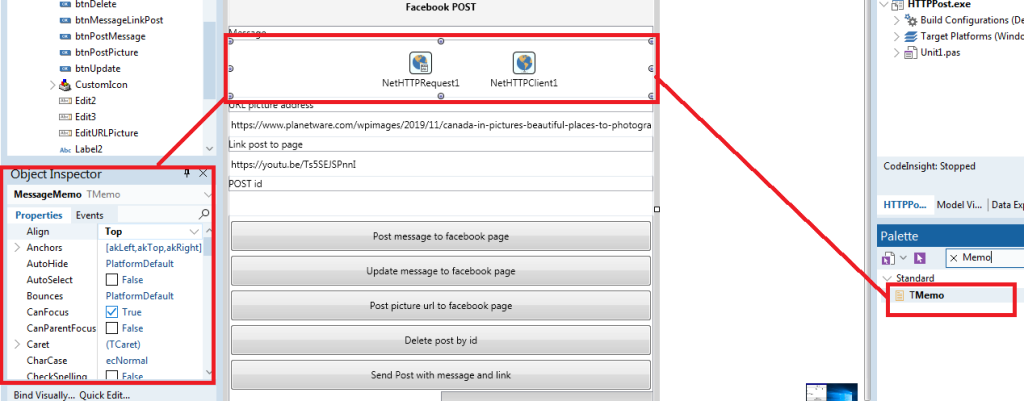
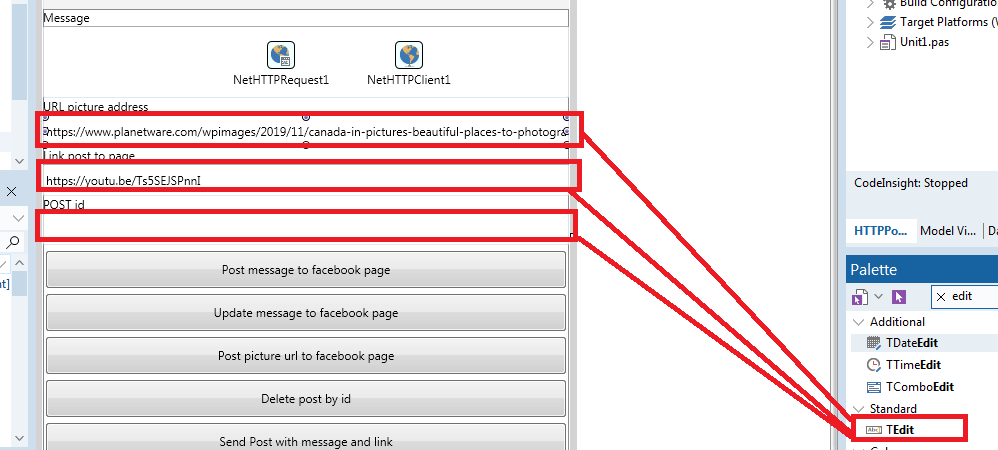
TEdit components are used to enter image URLs, links for posting on a Facebook page. To enter an id, by which you’ll be able to delete a post from the page in future if needed, also use the TEdit component.
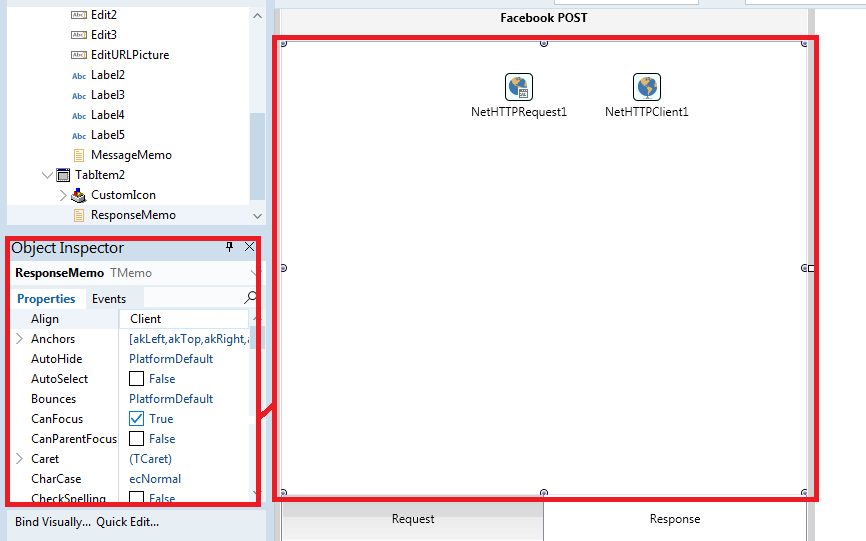
The response from the server in the form of JSON will be stored in the TMemo component.
In the onCreate form event handler, we assign the page access token to a variable of type string (token)

The text message entered by the user is stored in the “mes” string variable.

The post parameters (message, link, image url) are passed using a POST request to the Facebook Graph API server. Delphi uses the TMultiPartFormData class to send data using the POST method.

Next, the request with parameters is sent using the NetHttpRequest POST method, where the input parameters are the url address of the server, an object of the TMultipartFormData type with parameters to pass to the server, and a TMemoryStream object to store the data received from the server.

Code snippets of button handlers for posting a simple text message, updating a post, posting an image url, deleting a post, posting a message and a link are given below.
| 1234567891011121314151617181920212223242526272829 | // Post simple message to Facebook Page
procedure TForm1.btnPostMessageClick(Sender: TObject);
begin
mes := MessageMemo.Text;
TTask.Run(
procedure
var
LMultipartFormData: TMultipartFormData;
LMS: TMemoryStream;
begin
LMultipartFormData := TMultipartFormData.Create;
LMultipartFormData.AddField('message', mes);
LMS := TMemoryStream.Create;
NetHTTPRequest1.Post
('https://graph.facebook.com/v12.0/103766905472273/feed?message&access_token='
+ token, LMultipartFormData, LMS);
TThread.Synchronize(nil,
procedure
begin
ResponseMemo.Lines.LoadFromStream(LMS);
TabControl1.GotoVisibleTab(1)
end);
LMS.Free;
LMultipartFormData.Free;
end);
end; |
| 1234567891011121314151617181920212223242526272829 | // Post url picture to Facebook Page
procedure TForm1.btnPostPictureClick(Sender: TObject);
begin
TTask.Run(
procedure
var
LMultipartFormData: TMultipartFormData;
LMS: TMemoryStream;
begin
LMultipartFormData := TMultipartFormData.Create;
LMultipartFormData.AddField('url', EditURLPicture.Text);
LMS := TMemoryStream.Create;
NetHTTPRequest1.Post
('https://graph.facebook.com/v12.0/103766905472273/photos?url&access_token='
+ token, LMultipartFormData, LMS);
TThread.Synchronize(nil,
procedure
begin
ResponseMemo.Lines.LoadFromStream(LMS);
TabControl1.GotoVisibleTab(1)
end);
LMS.Free;
LMultipartFormData.Free;
end);
end; |
| 123456789101112131415161718192021222324 | // Delete post by Id
procedure TForm1.btnDeleteClick(Sender: TObject);
begin
TTask.Run(
procedure
var
LMS: TMemoryStream;
begin
LMS := TMemoryStream.Create;
NetHTTPRequest1.Delete('https://graph.facebook.com/v12.0/' + Edit2.Text +
'?access_token=' + token, LMS);
TThread.Synchronize(nil,
procedure
begin
ResponseMemo.Lines.LoadFromStream(LMS);
TabControl1.GotoVisibleTab(1)
end);
LMS.Free;
end);
end; |
| 12345678910111213141516171819202122232425262728293031323334353637383940414243444546474849505152535455565758596061 | // Post Message and link to Facebook Page
procedure TForm1.btnUpdateClick(Sender: TObject);
begin
mes := MessageMemo.Text;
TTask.Run(
procedure
var
LMultipartFormData: TMultipartFormData;
LMS: TMemoryStream;
begin
LMultipartFormData := TMultipartFormData.Create;
LMultipartFormData.AddField('message', mes);
LMS := TMemoryStream.Create;
NetHTTPRequest1.Post('https://graph.facebook.com/v12.0/' + Edit2.Text +
'?message&access_token=' + token, LMultipartFormData, LMS);
TThread.Synchronize(nil,
procedure
begin
ResponseMemo.Lines.LoadFromStream(LMS);
TabControl1.GotoVisibleTab(1)
end);
LMS.Free;
LMultipartFormData.Free;
end);
end;
procedure TForm1.btnMessageLinkPostClick(Sender: TObject);
begin
mes := MessageMemo.Text;
link := Edit3.Text;
TTask.Run(
procedure
var
LMultipartFormData: TMultipartFormData;
LMS: TMemoryStream;
begin
LMultipartFormData := TMultipartFormData.Create;
LMultipartFormData.AddField('message', mes);
LMultipartFormData.AddField('link', link);
LMS := TMemoryStream.Create;
NetHTTPRequest1.Post
('https://graph.facebook.com/v12.0/103766905472273/feed?message&link&access_token='
+ token, LMultipartFormData, LMS);
TThread.Synchronize(nil,
procedure
begin
ResponseMemo.Lines.LoadFromStream(LMS);
TabControl1.GotoVisibleTab(1)
end);
LMS.Free;
LMultipartFormData.Free;
end);
end; |
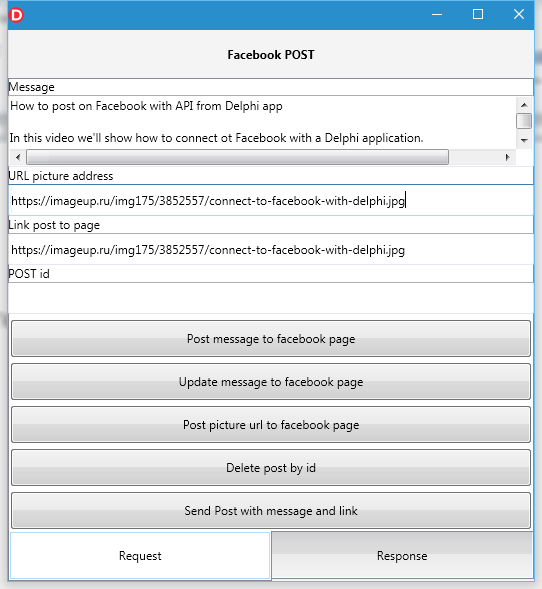
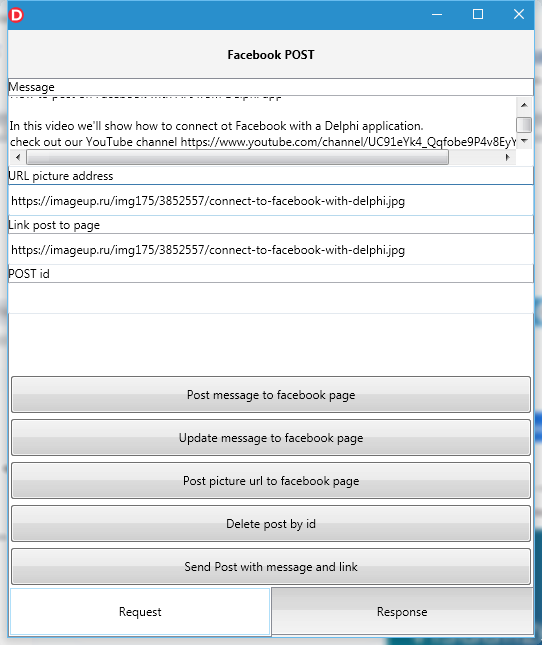
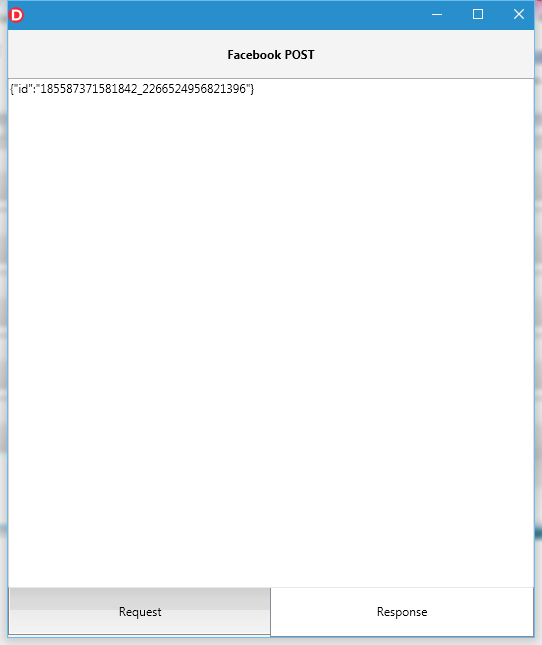
The app’s operation on the MSWindows platform is shown below. Posting a simple text message
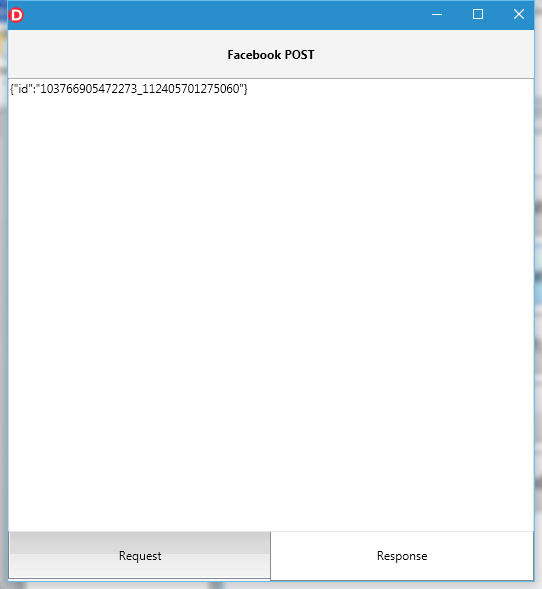
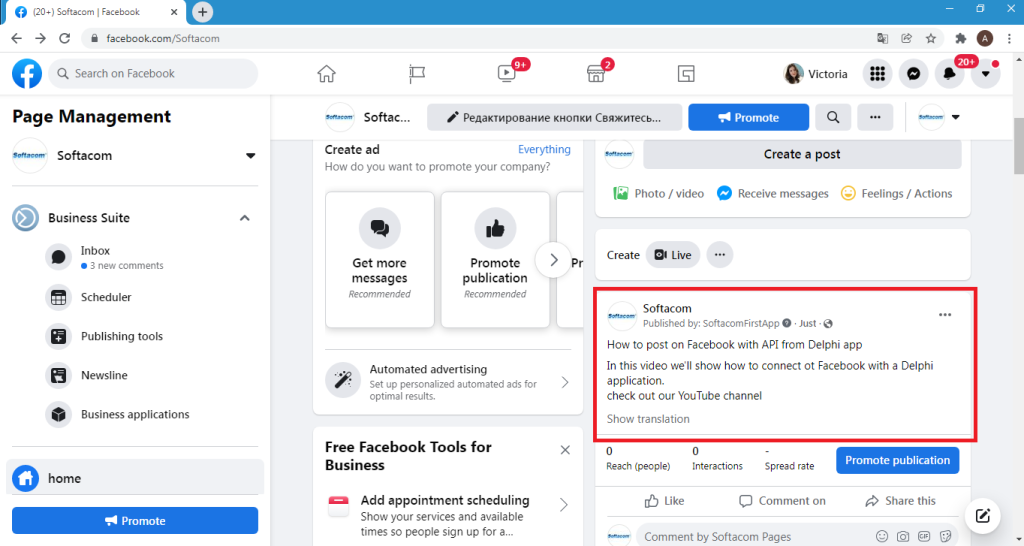
Below is the result of posting a text message on the Softacom page
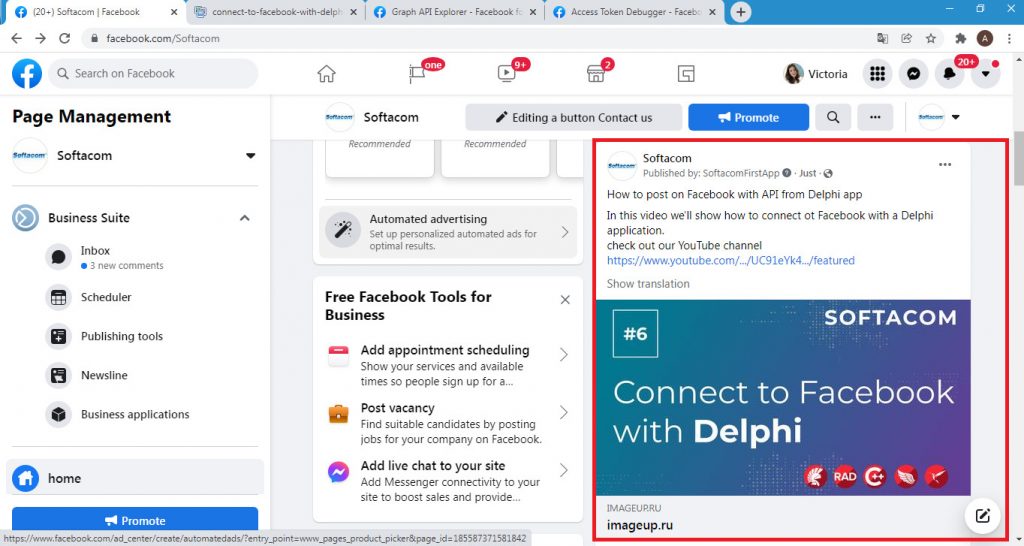
The result of posting a text message and a link on the Softacom page
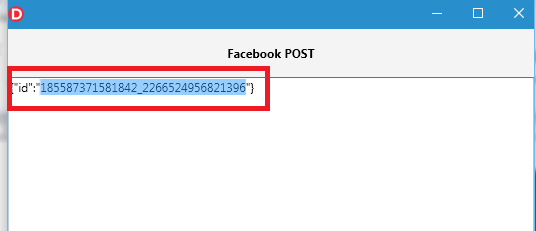
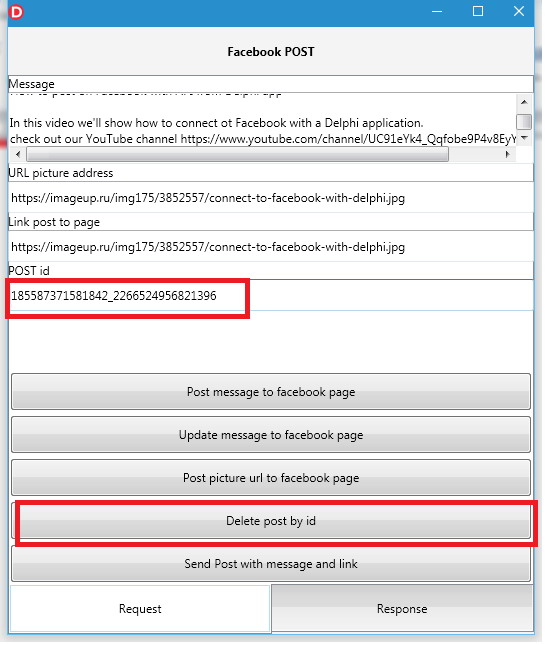
If desired, you can delete the post from the Facebook page using post Id. To do this, use the capabilities of the FMX application.
Enter Id and click “Delete post by id”.
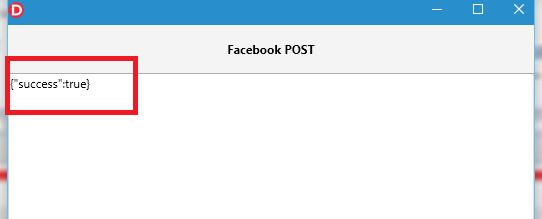
The post on the Softacom page has been successfully deleted.
Watch step by step guide on our youtube channel


