- Overview
- Where and How to Start
- Migrating from the .NET Framework to .NET 5.0
- Step 1: Analyze the portability
- Step 2: Use the .NET Upgrade Assistant
- Step 3: Upgrade to Visual Studio 2019 or Later Versions that Support .NET 5 Development
- Step 4: Update .NET SDK to Version 5.0 or Later
- Step 5: Migrating from the .NET Framework to .NET 5.0
- Step 6: Review Your Existing Application
- Step 7: Upgrade Project to .NET Core
- Step 8: Resolve API and Library Compatibility
- Step 9: Refactor Code for .NET 5.0 Features
- Step 10: Test and Debug Migration
- Why Should I Upgrade to .NET 5.0
- Useful Links
- .NET Framework to .NET 5.0 Migration Checklist

Overview
As a developer, you might ask how to migrate from .NET framework to .NET 5? The process is complex, and requires careful planning and execution. Here, we will provide a guide for you to follow to complete .NET 5 migration. Whether you’re starting a new project or upgrading an existing one, understanding the necessary steps and tools to migrate to .NET 5 can streamline the transition. Take advantage of the latest features and improvements offered by .NET 5.0.
Where and How to Start
To upgrade to.NET 5, download the.NET 5 SDK from Microsoft’s website, use an IDE like Visual Studio 2019 or later, and use the NuGet Package Manager to manage external libraries. Create a backup of your project before starting the upgrade process, refer to Microsoft’s documentation for specific steps, and use tools like the.NET Upgrade Assistant to identify potential compatibility issues. Consider an incremental upgrade approach. Let’s look at the steps required for this in more detail.
Migrating from the .NET Framework to .NET 5.0
To start the .NET 5 migration from .NET Framework, it is recommended that you read Microsoft’s official migration documentation. This will help you understand the basic steps and the upgrade process.
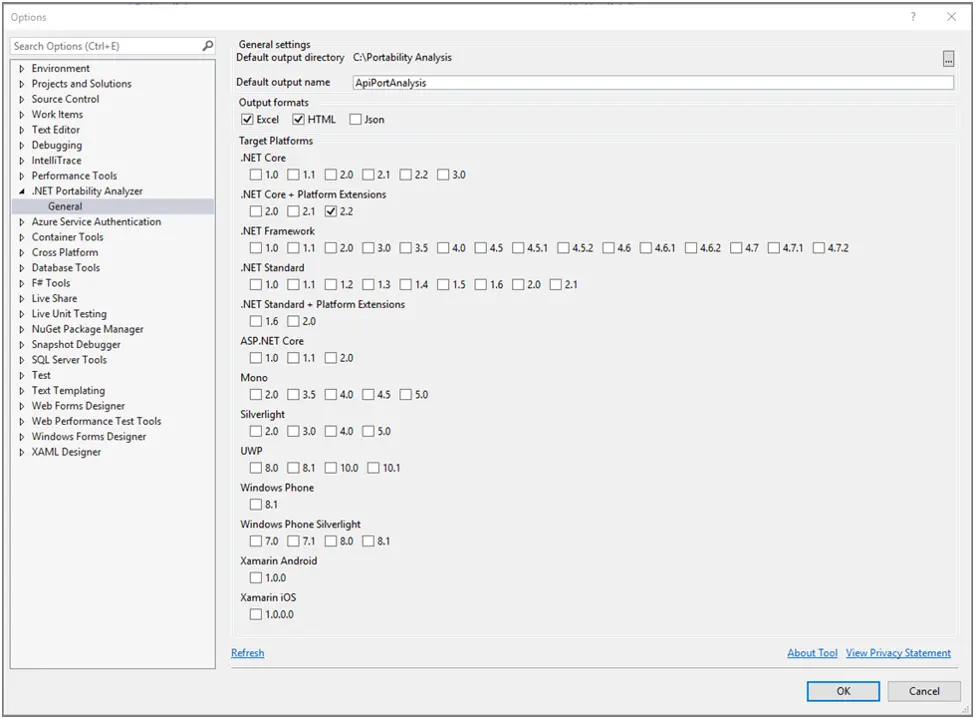
Step 1: Analyze the portability
The first step to upgrade to .NET 5 is analyzing portability. Start by accessing the Portability Analyzer tool that you can find on the official Microsoft website. Use the tool to determine the portability of your app to .NET 5. This step eliminates any potential hassles down the line.
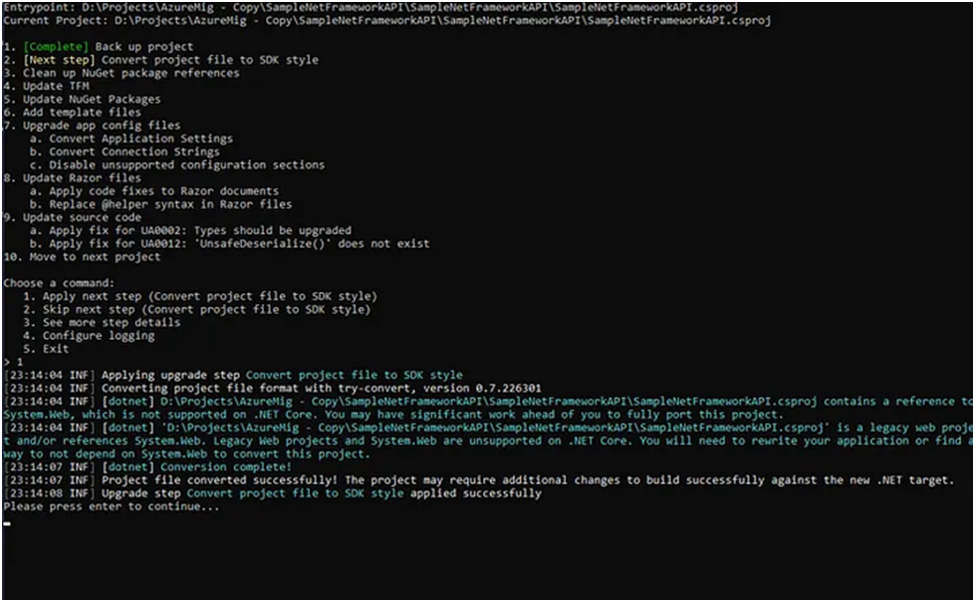
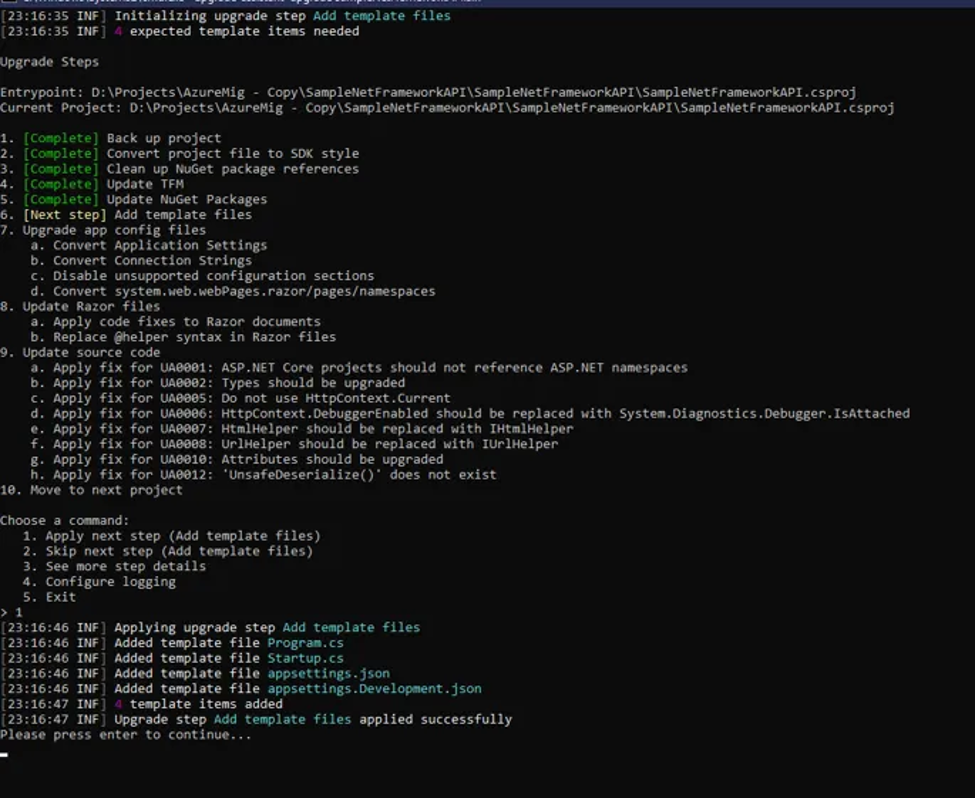
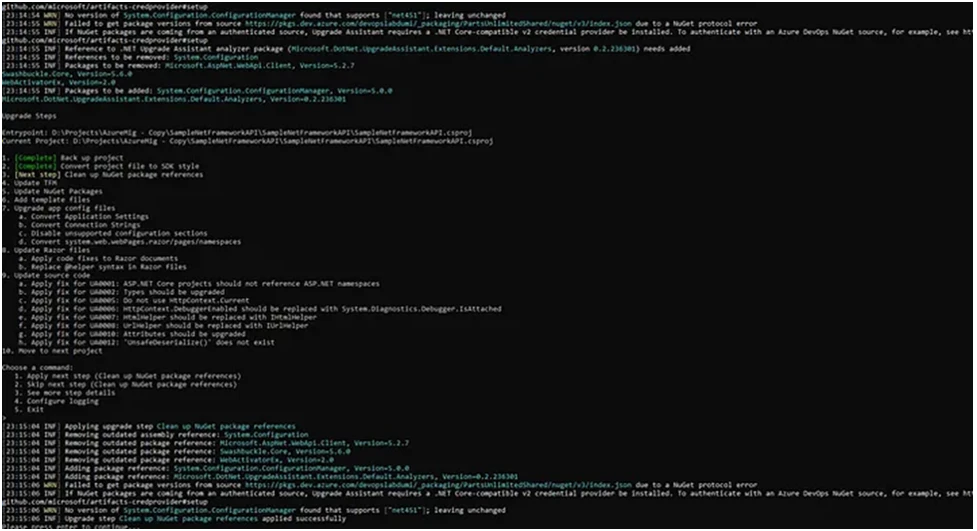
Step 2: Use the .NET Upgrade Assistant
In general, .NET 5 migration manually can prove laborious. Eliminate most of the grunt work from the process by using the .NET Upgrade Assistant from Microsoft. This command-line tool works well with many apps, enabling you to update them to the .NET 5 framework. You need to upgrade existing tools to use the .NET Upgrade Assistant.
Step 3: Upgrade to Visual Studio 2019 or Later Versions that Support .NET 5 Development
Install or update Visual Studio to the latest version by downloading the tool from the official Microsoft website. Follow the installation instructions. After you installed Visual Studio and can proceed with .NET 5 migration.
Step 4: Update .NET SDK to Version 5.0 or Later
Install the latest .NET SDK. Use the .NET CLI or Visual Studio installer to update the SDK. The .NET SDK version 5.0 (or later) is installed on your machine. After updating these tools, you can start installing the .NET Upgrade Assistant.
Step 5: Migrating from the .NET Framework to .NET 5.0
Prepare the project structure by ensuring that your solution and projects are organized efficiently for the migration process. Review the current project structure and make the necessary adjustments. Use Visual Studio’s solution explorer to reorganize projects and dependencies. The solution will have the proper structure for .NET 5 migration.
Step 6: Review Your Existing Application
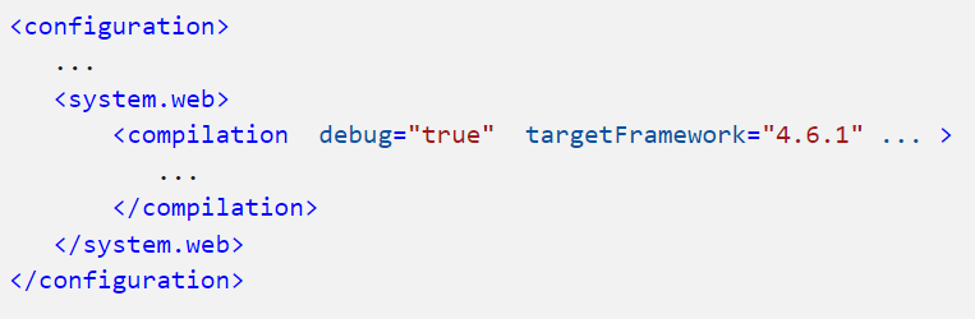
Review your current .NET framework application. Identify dependencies, third-party libraries, and any features specific to the framework. Use tools like Visual Studio’s migration assist or the .NET Portability Analyzer to analyze the codebase. Update the .csproj file to net5.0. A clear understanding of the application’s complexity and compatibility with .NET 5.0.

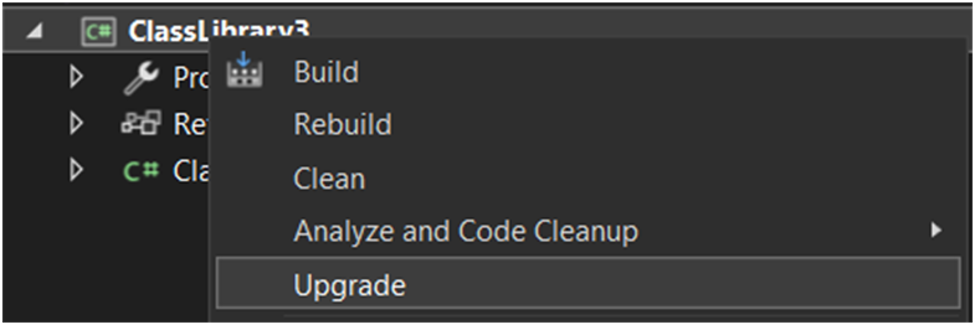
Step 7: Upgrade Project to .NET Core
Convert the .NET framework to .NET Core. Open the project in Visual Studio, right-click on the project, and select “Convert to .NET Core”:
<Project Sdk=”Microsoft.NET.Sdk.Web”>
<PropertyGroup>
– <TargetFramework>netcoreapp3.1</TargetFramework>
+ <TargetFramework>net5.0</TargetFramework>
</PropertyGroup>
</Project>
The project is successfully converted to .NET Core, resolving framework-specific dependencies.
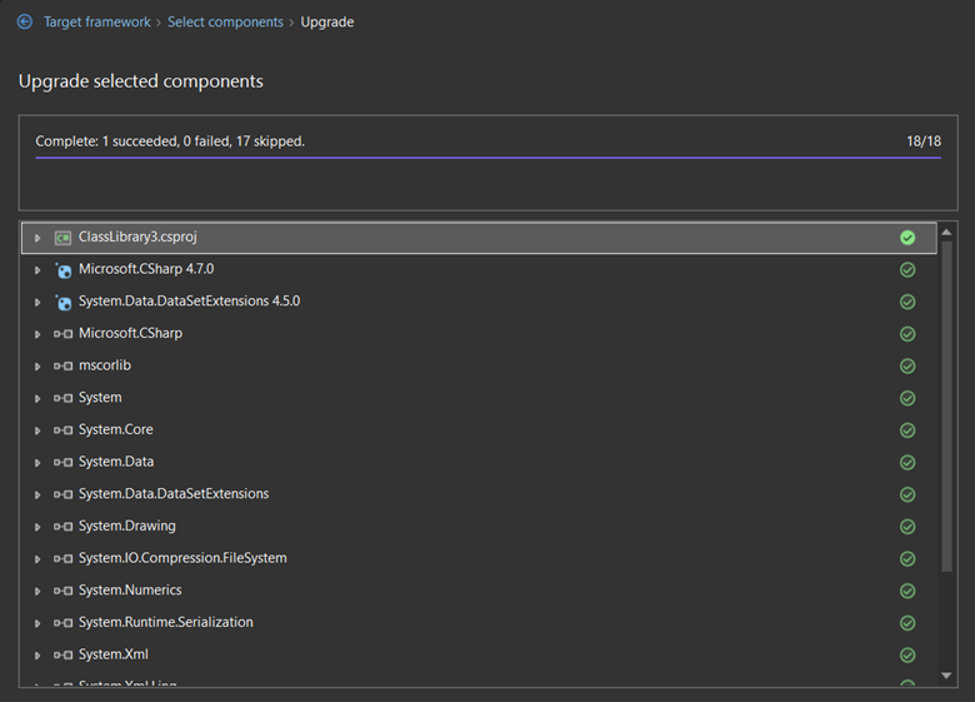
Step 8: Resolve API and Library Compatibility
The APIs and libraries should be compatible with .NET 5.0. The NuGet Package Manager will update all packages to be compatible with .NET 5.0. All APIs and libraries are compatible with the platform, ensuring functionality after .NET 5 migration.
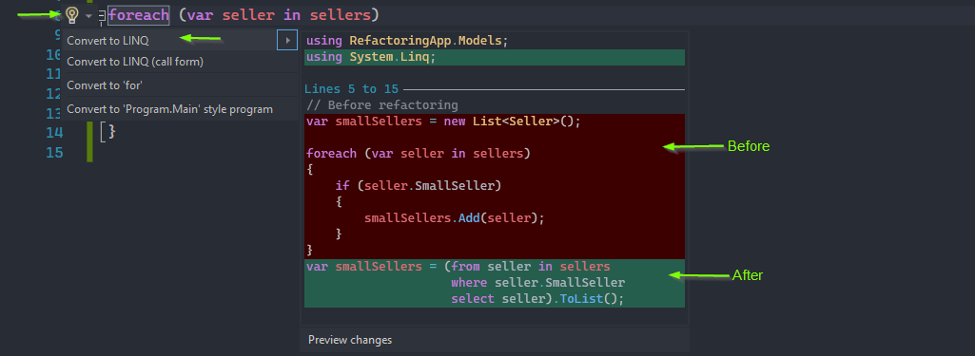
Step 9: Refactor Code for .NET 5.0 Features
Modify code to leverage new features and improvements in .NET 5.0. Use .NET 5.0 documentation and migration guides to refactor code accordingly:
Codebase updated to utilize .NET 5 features, enhancing performance and maintainability
<ItemGroup>
<Compile Include=”..\FlexGridOnFramework\**\*.cs” />
<EmbeddedResource Include=”..\FlexGridOnFramework\**\*.resx” />
</ItemGroup>
Step 10: Test and Debug Migration
Conduct thorough testing and debugging to ensure functionality and performance post-migration. Use unit tests, integration tests, and debugging tools in Visual Studio. The application passes all tests and operates as expected in a .NET 5 environment.
Once you complete all these steps for .NET 5 migration, you need to optimize the performance of the app manually. You can do this by optimizing code, leveraging asynchronous programming, and utilizing caching mechanisms.
Why Should I Upgrade to .NET 5.0
The following are the main reasons behind this update to.NET 5:
- Performance. Enjoy improved performance with .NET 5 migration. Scaling is easier than with any other previous version.
- Cross-platform compatibility. Upgrade to .NET 5, and you will be able to develop apps and software that run across platforms. Eliminate the need to create a separate version of any application for Linux, Windows, and macOS.
- New language features. The .NET 5.0 framework includes modern language features. Creating apps for different platforms is therefore more convenient. The platform also includes enhancements and improvements, including C#.
- Lack of support for previous versions. You will not find support for previous versions of the .NET framework. Convert .NET framework 4.8 to .NET 5 to eliminate this issue and use a modern version of the framework.
- Cutting-edge development. Stay abreast of the cutting-edge features that Microsoft’s platforms offer. Migrate to .NET 5 to get compatibility across platforms with optimal support, ensuring seamless performance and a wide variety of features.
In general, you can see that the benefits of such migration increase the productivity and stability of your website, and also add new features.
Useful Links
.NET 5 migration can prove a major step in upgrading and enhancing your development. Follow the steps outlined above, and the process becomes easier. Moreover, use these useful links to simplify the process:
1. Official Microsoft .NET 5.0 Documentation
2. Migration Guide: .NET Framework to .NET 5.0
There you can find other useful links that will help you update to other versions.
.NET Framework to .NET 5.0 Migration Checklist
For a successful migration and not to miss anything important, check this short list:
- Upgrade Visual Studio. You can find the latest version on the Microsoft website.
- Update .NET SDK to version 5.0 or later.
- Convert projects to prepare them for .NET 5 migration.
- Check current app for compatibility.
- Upgrade the project to .NET Core.
- Resolve the library and API compatibility.
- Refactor your code to the .NET 5 features.
- Test and debug.
- Optimize performance.
- Update documentation.
So, there you go, .NET 5 migration made easy. Follow this comprehensive checklist by using it as a roadmap to successfully convert .NET framework to .NET 5. Gain the ability to create high-performance apps with this improved development platform.